Menus
Menu structure in the CMS
Top level navigation is what appears in the menu bar when you first visit the site.
Second level navigation is what appears in the sub-navigation at the top when you click a top level navigation option. Second level navigation is set as you add content by selecting a top level navigation choice as the parent.
Third level navigation is what appears on the left when you choose a second level navigation link. Third level navigation is set as you add content by selecting a second level navigation choice as the parent.
Fourth level navigation appears indented on the left. Fourth level navigation is set as you add content by selecting a third level navigation choice as the parent.
IMPORTANT: You should not add navigation in Structure / Menus in most cases. If you do that it can cause problems. You should set up the navigation as you add content by using the Provide a menu link checkbox in the lower options on each content type.
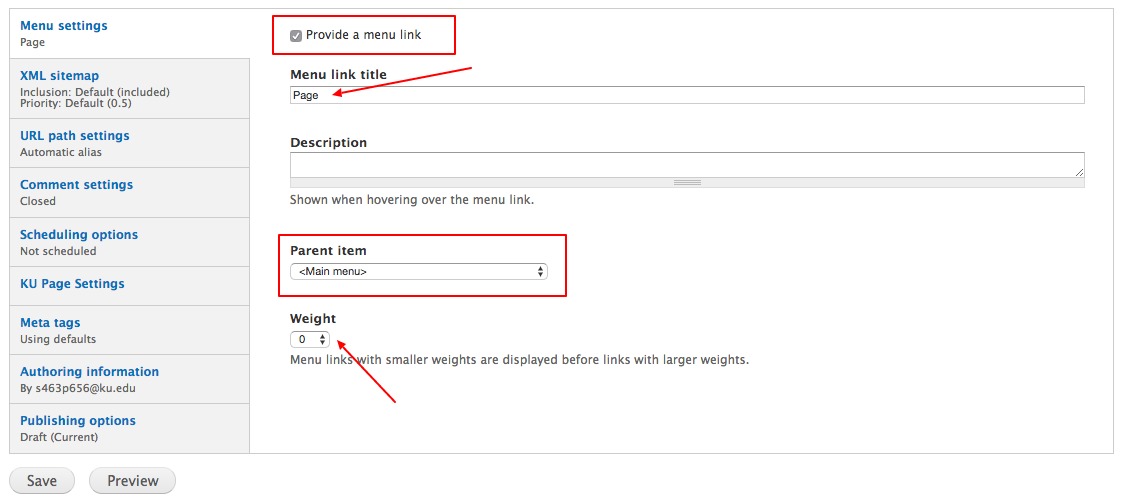
How to set Menu Links:
- At the bottom of the page check the Provide a menu link checkbox
- Select the Parent Item from the dropdown menu.
OPTION: You can modify the Menu link title in the Menu link title field. By default the link title is the title of the page.
OPTION: You can set the Weight of the menu link. The weight is the page's position in the menu. Lower numbers appear further to the left on the horizontal menu or top on the vertical menu. An easier way to reorder menu items is described below. - Publish or Save the page.
How to rename, rearrange or add a menu link:
You can modify menu item names, rearrange the navigation order, disable and add top level menu items to your menus.
- Click Structure in the black admin toolbar. Then select Menus.
- Look for Main Menu. Click the List Links link.

- On the resulting page you will see a list of all the menu links you have on your site.
- Reorder the menu items by clicking and dragging the cross icon at the left.
- Rename a menu item by clicking the Edit link
- Disable a menu item by deselecting the Enabled checkbox
- Delete a menu item by clicking the Delete link
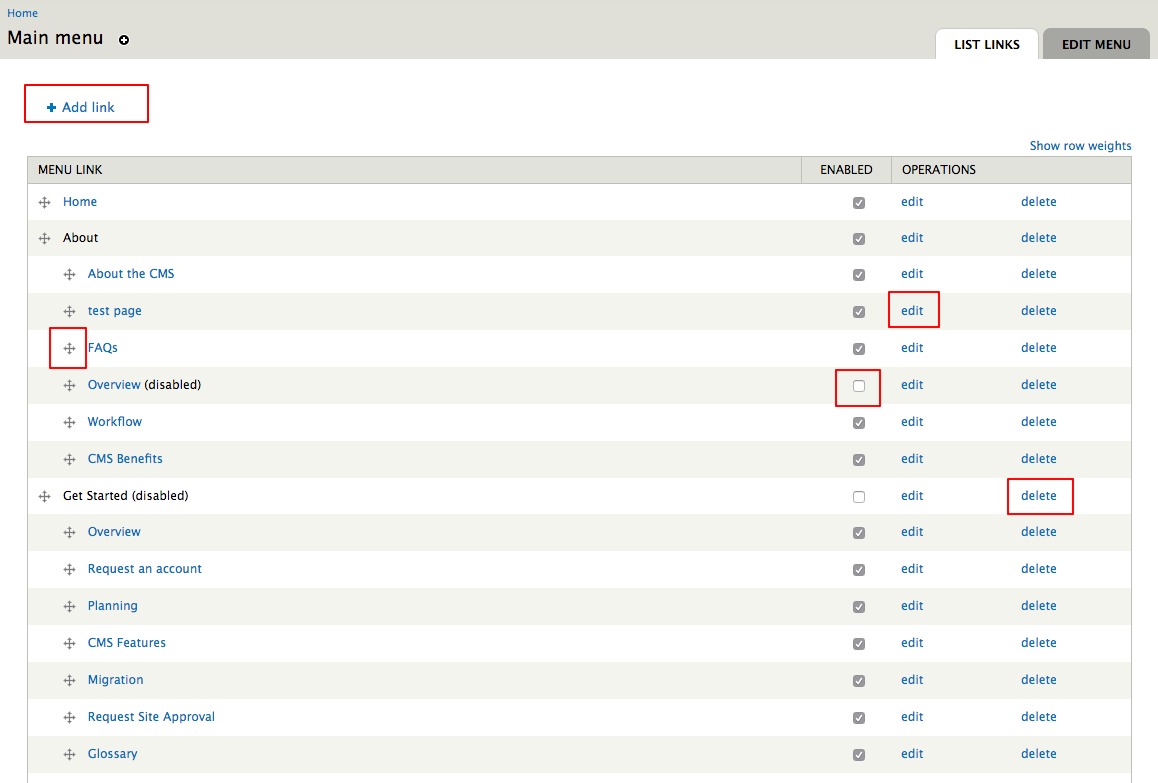
- To add a menu item click Add link.
- Give the menu item a name.
- Set the Parent Item
- Set the Path.
NOTE: If this is a top menu item that will have pages underneath the menu the path must be <nolink>. If the link directly links to a page enter the Node number. If the link leads off site set the path to the URL followed by the HTML entity»to indicate the user is leaving your site. - Click Save

- After adding the link, it will appear in the list of all menu links. You can drag it to the correct location using the cross icon to the left of the menu name, then click Save Configuration.
BEST PRACTICE: You should not set up duplicate navigation items to the same page. It is disorienting and confusing to site visitors.