Tables
Tables are created using the Table button in the content editor. There are two styles available in addition to the default style.
To create a Table:
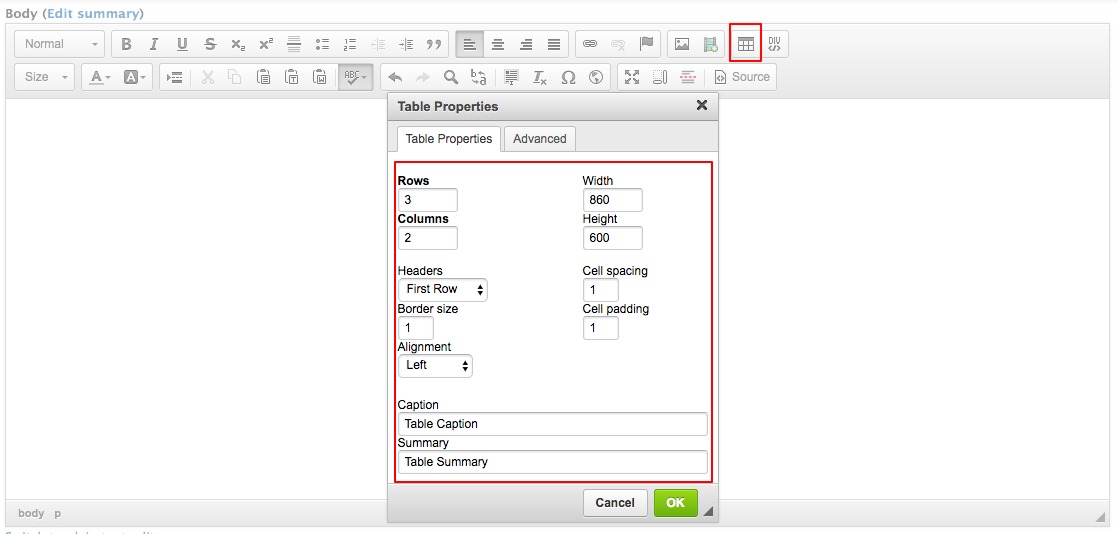
- Place your cursor within the body field, then click the Table button in the content editor.
- Provide a number of Rows and Columns for your table. Optionally set a Width and Height.
- If you want a header row or column for your table, which appears with a gray background, select an option from the Headers dropdown menu.
- Set Border size and Alignment for the table.
- You can add a Table Caption, which appears above the table.
- Then add a Table Summary, which is used by screen readers.
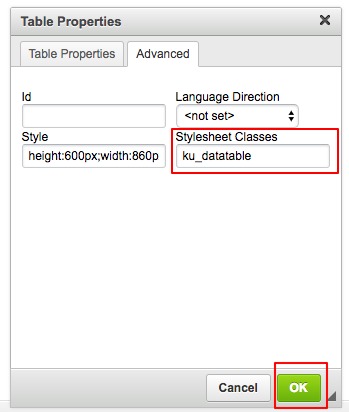
- If you want to apply one of the two table styles select the Advanced tab and enter either ku_datatable or ku_noborders in the Stylesheet classes field. (See examples below.)
- Finally, click OK.
Example table with no classes applied.
| Header 1 | Header 2 |
|---|---|
| content 1 | content 2 |
| content 3 | content 4 |
| content 5 | content 6 |
Example table with the ku_datatable class applied.
| Header 1 | Header 2 |
|---|---|
| content 1 | content 2 |
| content 3 | content 4 |
| content 5 | content 6 |
Example table with the ku_noborders class applied.
| Header 1 | Header 2 |
|---|---|
| content 1 | content 2 |
| content 3 | content 4 |
| content 5 | content 6 |