Adding Photos & Graphics
Photos and graphics (images) are uploaded and placed within the page by clicking the Image button in the content editor. For more on image sizes, see the Guide to Image Sizes page.
- Place your cursor where you want to place your photo or graphic within the Body field. Then click the Image button.
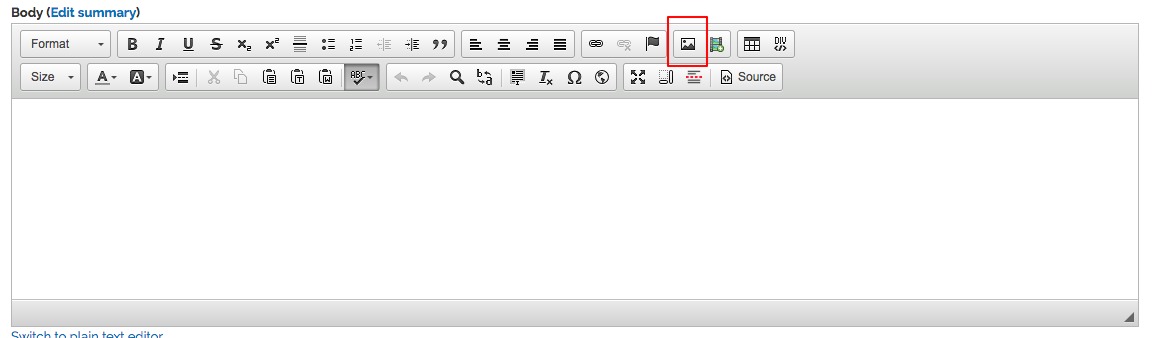
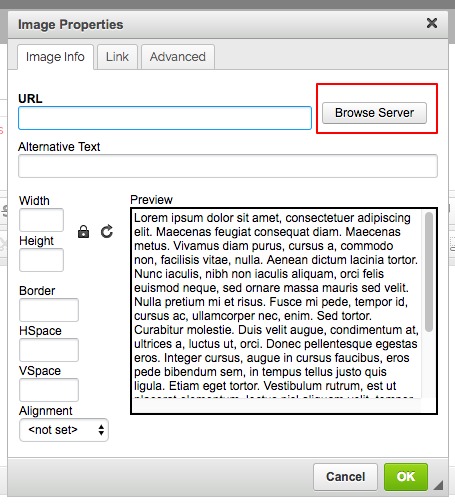
- You will be provided a dialog box for the Image Properties. Images for your website must be uploaded to the File Browser for use on your website. To access the File Browser click the Browse Server button. Then locate an image that has already been uploaded or upload an image. To learn how to upload files please the File Browser instruction page.
- Select the image and then select the Insert button.
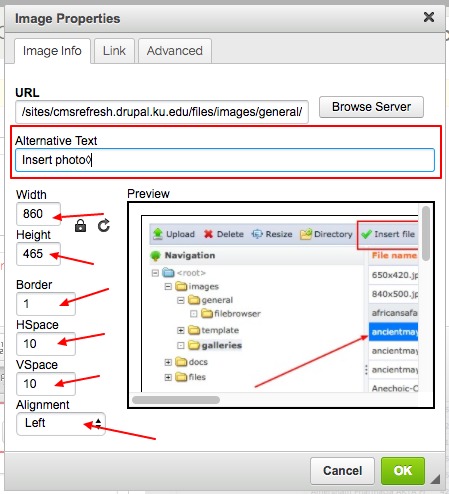
- After you insert the file, there are options available.
- IMPORTANT: To conform to the web accessibility standards, please type in Alternative Text to provide descriptive text for the image to be used by screen readers for those with vision impairments.
- Add a Border around the image. Borders are in pixels and 1 is a good setting to use.
- Add Horizontal (HSpace) and/or Vertical (Vspace) spacing to your image so that any text around the image doesn't butt up against the image.
- Set image Alignment to left or right aligned.
- Select OK.
Once your image is place, double click on it to return to the Image Properties box to make any edits.