Blocks
Blocks are content items that you can add to either your unit/dept sidebar or within a page.
Adding a new block:
- Click the Blocks link in the gray admin toolbar
- Click the Add Block link
- You will be presented with a form with these fields:
Block title: This is an optional field. If you enter a title, it will appear above your content wherever your block is displayed
Block description: This is a required field. Name it something you will be able to easily identify
Block body: This contains the content for the block. You can add pictures, links, etc here

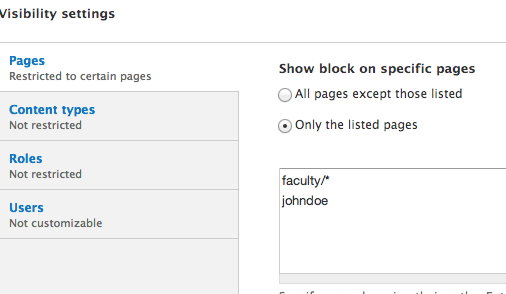
Set the Block visibility:
- After entering the content, you will need to update the visibility settings to decide what pages the block will be shown on. If you leave this section blank, it will allow the block to appear on all pages in your site. If you would like to restrict it to certain pages only, type them into the box. There are several visibility options you can choose from.
- Click Save Block
Adding blocks to your unit sidebar
- Click Blocks in the gray admin toolbar
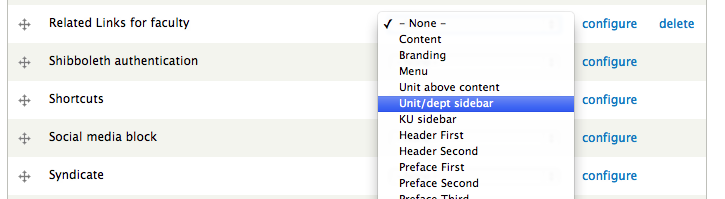
- Scroll to the bottom of the page and look for the block you created. Your block will be labeled with whatever you entered in for its description. Once you find your block, click the select box next to it and choose Unit/dept sidebar in the Region dropdown menu.
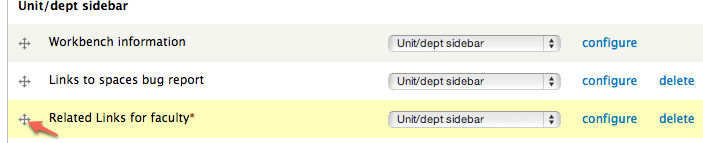
- Scroll back up to the top of the screen, you should now see the block listed in the Unit/dept sidebar section. You can use the cross icon to the left of your block name to drag and reorder your blocks
- Click Save Blocks at the bottom of the screen
Including block content inside a page:
One of the most useful things you can do with a block is include the content on another page or pages. This allows you to create/edit content in one spot and have update in multiple places.
- The first thing you need to know is the machine name of your block. Click Blocks in the gray admin toolbar.
- This next part is challenging. Find the block of content you want to include, then hover over the configure button and look in your browser's status bar to find the block delta number (alternatively you can right click on the link, copy the link, and paste the link somewhere you can see it).
The part of the link address the appears before "configure" is what you need. The first item is the blockname, the second is the delta. - Using the above gotten name you can include this content anywhere on your site by typing into the body:
[block:blockname=delta]
In the above example this becomes:
[block:block=5]

Including block content from another CMS website
Blocks that you create can also be shared to other CMS websites. This can be accomplished by using the following code:
[block:ku_include=site=sitename.drupal.ku.edu|block=number]
sitename is the prefix for the site (ie, cms, in cms.ku.edu). Replace "number" with the delta number of the block on the remote site.
Example:
[block:ku_include=site=cms.drupal.ku.edu|block=5]
When the block content is updated on the site that owns the block, it will automatically update all sites that are pulling that block.